Classifying assets for the asset library
By assigning a class to an asset you've created, you're telling Novelty how that asset should preferably be used. For instance, by setting the class of a Texture to "background", it will be placed in the Backgrounds folder in the Asset library.
The benefit of this is that Novelty can offer convenience functions and better organization. For example, an asset classified as a sound effect will not be available to a Play BGM action.
- Assigning a class (when importing assets)
- Assigning a class (using NoveltyML Designer)
- Assigning a class (in NoveltyML)
- Class reference

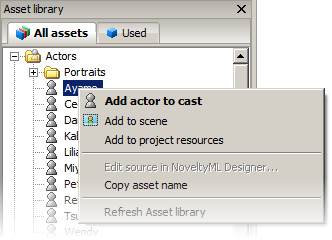
Fig 1: Assets classified as actors appear in the Actors folder.
Assigning a class (when importing assets)
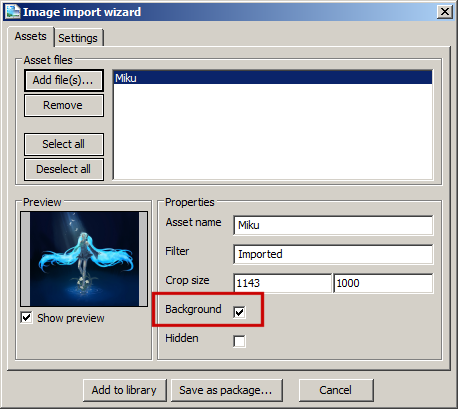
To assign a class to an asset in the import wizard you only need to check the corresponding box.

Fig 2: Checking an image as a background before importing it
Assigning a class (using NoveltyML Designer)
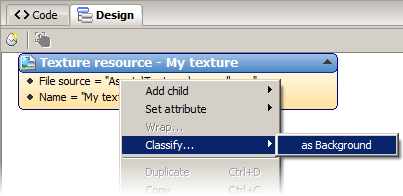
While in the Design tab, right-click the asset to bring up its context menu and select Classify...

Fig 3: Classifying an asset in the Designer
Assigning a class (in NoveltyML)
To assign a class to an asset in NoveltyML you must add a Meta tag and set its class attribute, as such:
<Texture name="My texture" source="Assets\Textures\Image.jpg" >
	<Meta class="background" />
</Texture>
Class reference
| Class name | Description | Applicable asset types |
| actor | Asset is an actor or character | Canvas, CanvasSet, Gradient, Image, Set, SmartCanvas |
| background | Asset is a background | Texture |
| bgm | Asset is background music | Audio |
| effect | Asset is a sound effect | Audio |
| vocal | Asset is a vocal | Audio |
