Using the NoveltyML Designer
The NoveltyML Designer is a tool that will help you create objects and assets using NoveltyML. It offers syntax highlighting, autocompletion and a live preview, among other things.
Related articles:The Designer's interface
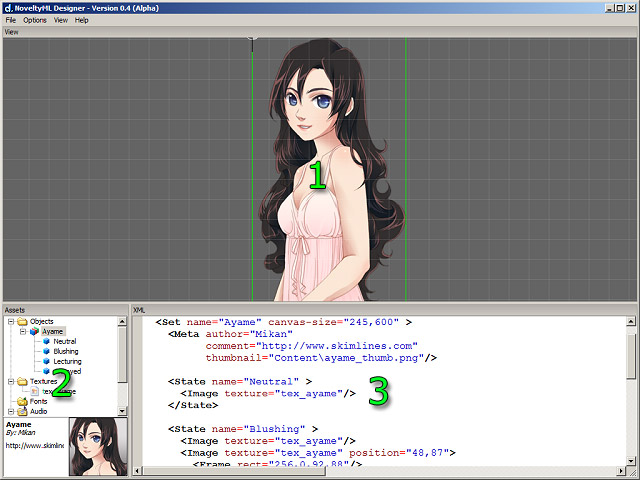
Fig 1: NoveltyML Designer
- View window
- Assets window
- NoveltyML edit window
View window
This window will automatically update and show you how the selected objects will look in Novelty.
Note: The preview can only update when the NoveltyML is valid.
Assets window
As new assets are created with NoveltyML, they will appear here. This window will show you all of the assets generated from the NoveltyML in the same tree structure as in the Novelty editor.
Click an asset to preview it in the View window.
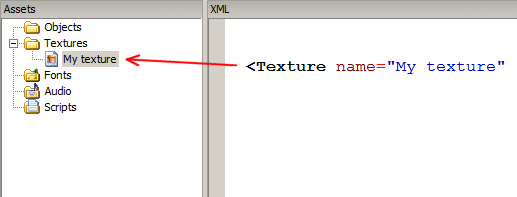
Fig 2: Each asset has a piece of NoveltyML associated with it.
NoveltyML edit window
This is where you type your markup. The editor is designed to help you to write XML faster and with less errors. The syntax coloring will keep you from making syntactical errors by highlighting invalid syntax.
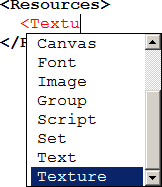
When the editor recognizes that you've begun writing a new tag it will show an autocompletion popup. It will show a list of possible tags. You can always bring up this list of suggestions by pressing Ctrl+Space.
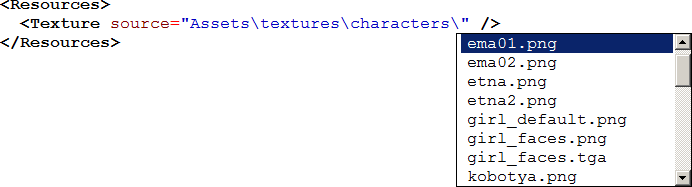
Pressing Ctrl+Space while entering a filename will show a list of suggested filenames:
Typing assistant
To help you type NoveltyML faster you can use the typing assistant (enabled by default). The assistant will analyze what you're tying and fill in things whenever possible.
For example, if you type <Texture, the assistance will automaticall add <Texture name="" source="". Typing <Button> will add all of the different button states, and so forth.
If you dislike this kind of intrusive editing, you can turn off the assistant in the Options menu.