Introduction
In this tutorial you will learn the basics of writing scripts in Novelty and how to run them in your visual novel.
See also: Scripted events
Writing your first script
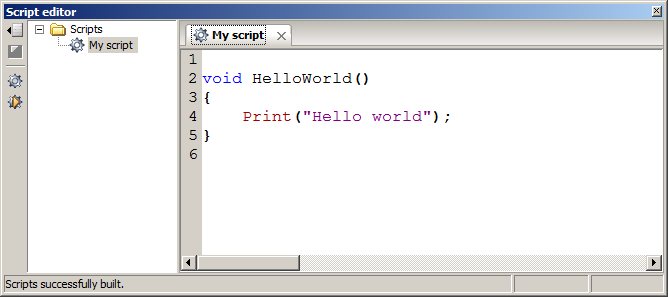
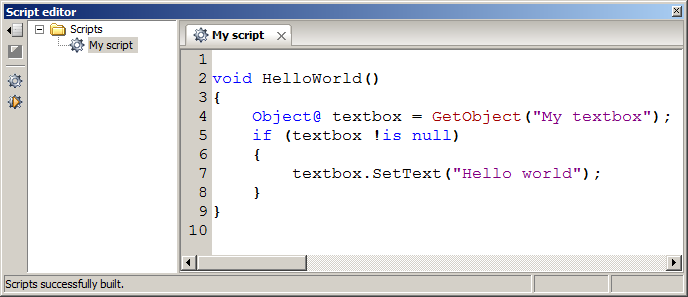
Open up the Script editor (Alt+S) and click the Add script-button to create a new script file. Then enter the following code:
What you've just written is a simple Hello world script. Here's how it works:
void HelloWorld()
{
}
This declares a new function called HelloWorld that takes no parameters and returns void (ie. it doesn't return any value).
Any code that's inside the "squiggles" ({ }) will be executed when the function is called.
Print("Hello world");This line calls one of Novelty's built-in functions, specifically the Print function. It takes a string and prints it out in the Console window. The line is terminated with a semi-colon (;).
Building your script
Now that you've written your first script you need to build it. Simply click the Build scripts button (![]() ).
).
Calling the script (using the Console)
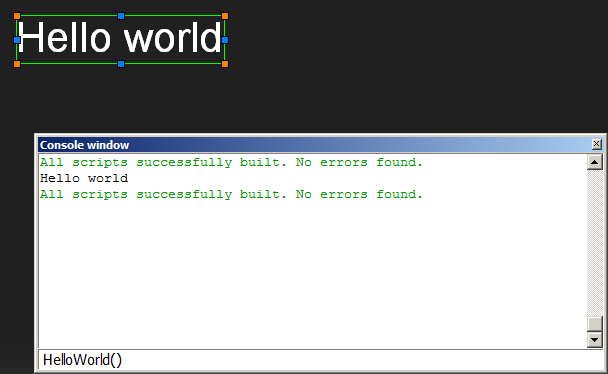
So how do we test this function? Open up the Console window (Alt+C). This window shows debugging information that can be useful when developing your game. It also lets you call script functions.
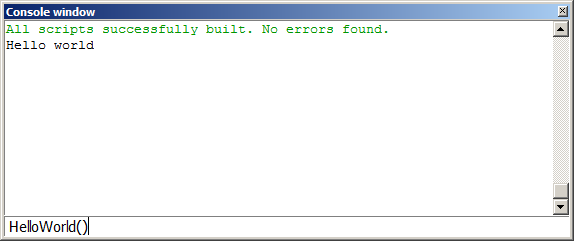
Type HelloWorld() in the text box at the bottom and press Return. This will call the function we just wrote and sure enough we can see it prints out the words "Hello world".
Accessing scene objects
This is all well and good but printing to the console might not be the most exciting thing you can think of. Let's use the code we've already written but print to the scene instead.
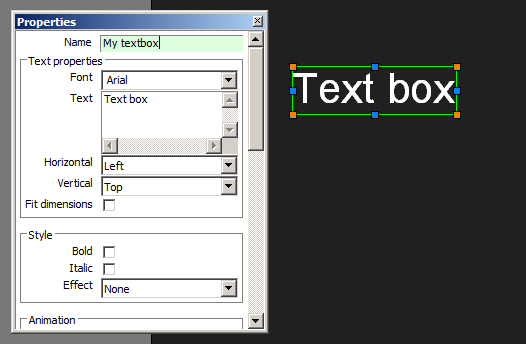
As always, if we want to show any kind of text in the scene we must first create a new Text object. Here I've created one and renamed it to My textbox. Giving objects unique names is important if we wish to access them later through scripts.
Now, change the code to the following:
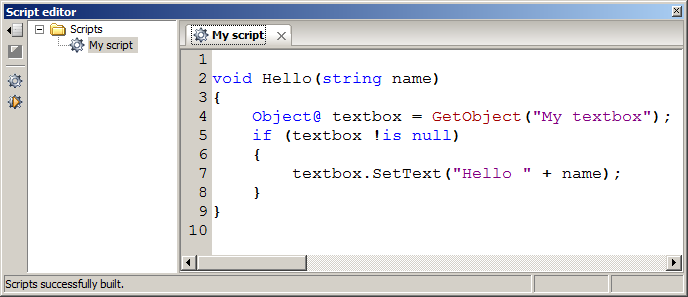
Object@ textbox = GetObject("My textbox");To access objects in the scene we need to invoke the GetObject-function. It takes a name and returns an Object handle (Object@), or null if the object wasn't found. If all goes well, we should have our textbox stored in the textbox-variable.
if (textbox !is null)
The is operator is used here to make sure textbox refers to a valid object in the scene and not "null". The exclamation mark (!) before is negates the check and should be pronounced "is not".
It's always good practice to make sure that a returned handle isn't null since there's no guarantee that GetObject will actully return a valid object handle. For instance the object might get changed or deleted.
textbox.SetText("Hello world");
Knowing we have a valid (non-null) object we can now safely call its SetText function. Similarly to the Print-function this will replace the text in the Text object to whatever string we pass it.
Just like before, we build and call our function using the console and we can confirm that it's working:
Adding input parameters
Let's make our script slightly more interesting by adding an input parameter.
Here I've changed the function declaration to:
void Hello(string name)
Unlike before, our function now take a single input parameter: name of type string. This means we can only pass it text; not integers, floats or other types.
Because it's a string we can combine it with the old one below:
textbox.SetText("Hello " + name);
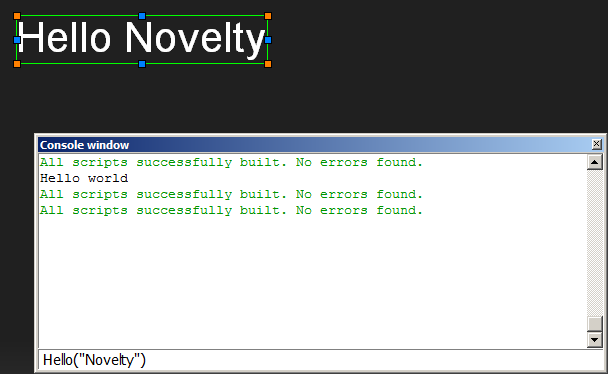
Consequentially, if we call Hello("Novelty") we now get this:
Calling scripts (using Actions)
Rather than invoking functions via the console, a more realistic scenario would be to call them with an action, in the middle of your game.
There is an action for this purpose, namely the Run script action:
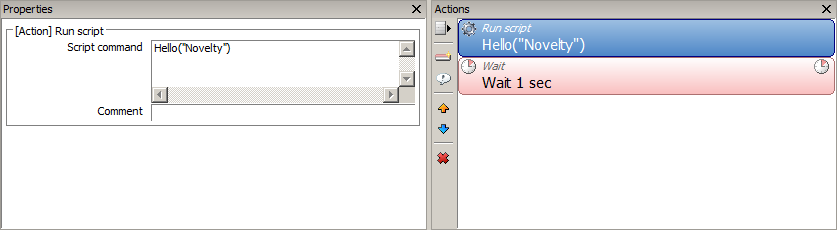
Here we have given it the same line as we did in the console which will yield an identical result, except this time it's scheduled among all of the other actions.
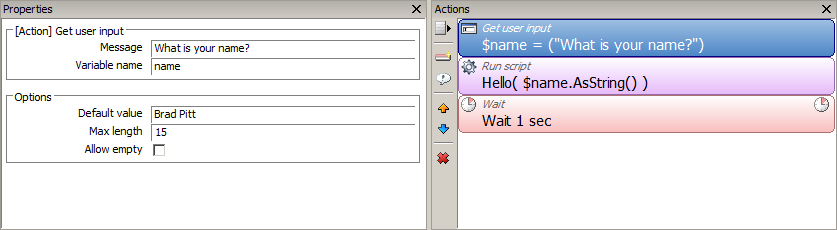
We can also use the script in combination with other actions. Here I'm asking the player for his or her name and storing it in a global variable before passing it to the Hello function.